INSIGHTS: How to Save Energy when Cooking Onboard
When at sea on long passages, far from everyone and everything, being frugal with water, food and energy is vital. It ensures that there is enough for the duration of the trip. Rekka Bell and partner circumnavigated the Pacific over the last 5 years, living off-grid. In this edition of INSIGHTS, Rekka shares some energy-saving tips when cooking on-board.
Published 3 years ago
When we cook, we monitor our energy usage, and use fuel-saving cooking techniques. When cooking, the heat from the stove is transferred to the pot, and a certain amount of that energy is lost. Higher efficiency can be achieved by ensuring that there is a maximum transfer of heat from the source of heat to the pot.
Use a lid. You will stop steam from escaping the pot, the steam is energy lost to the cooking process.
Use a pot skirt. A simple ring around the base of the pot, will help to preserve and concentrate heat.
Use less water. The less water used, the less energy is required to heat up the meal. On a boat with limited tankage, using less is better anyway.
Reduce intensity after boiling. After boiling point is reached, lower to a simmer or transfer to an insulated cooker (see below). Shorter cooking times also prevent nutrient-loss.
Cut food small. Chinese use this technique, they cut vegetables small so they cook fast in a stir-fry. Smaller cuts have more contact area and will soften quicker, take up more flavor and use less energy.
Pre-soak dry food. Legumes, grains and other kinds of dried food will cook faster when pre-soaked, don’t skip that step. We like to soak steel cut oats before bed, then it takes just 5-10 minutes to cook, rather than 20-30 minutes. The shorter time results in chewier oats (our personal preference).
Focus on the task. Obvious, but when distracted we use up more energy. Concentrate on the task, pay attention to cooking times so as to not overcook the food.
LACTO-FERMENTATION
Lacto fermentation is a way to prepare food without using heat, it only requires salt, an air-tight container, and time.

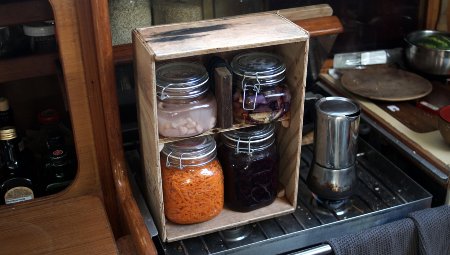
- Picked vegetables ready for consumption
All vegetables can be fermented. Microbial activity occurs which secrete lactic acid, co2 and a variety of enzymes. Lactic acid inhibits the growth of bad bacteria. The mixture eventually achieves a state of balance, and fermentation stops. Conserving vegetables this way can last many years, even when stored at room temperature.
Preparing food by lacto-fermentation keeps vitamins intact, and in some vegetables, increases their nutritional value. Fermentation also improves the immune system, and digestibility of the food, making them easier for our systems to assimilate.
We like to use spring top jars because they burp themselves, although coating the metal with oil may be necessary to keep rust away. Our favorite recipes include:
Once we open a jar we go through them fast, usually within a week, but they can last for months. It is necessary to take a few precautions though:
- Use clean tools. Don’t use a fork that’s been in your mouth.
- Keep vegetables submerged in brine. If too little remains in the jar but you’re not ready to eat them, transfer to a smaller, clean jar
- Close the jar between servings. Don’t leave it open unnecessarily.
- Store in a cool area. When opened, store the jar in an area under 15 C.
We don’t have refrigeration so we built a pickle self under our galley sink, the coolest place on our boat.
SPROUTING
Sprouting raw seeds, legumes and beans transforms dried foods into fresh green and nutritious foods. Brown lentils require 30 minutes of cooking on a stovetop, but germinating them cuts the time down to less than 10 minutes. Depending on their provenance we cook them, but germinating generally cuts their cooking time by a third.
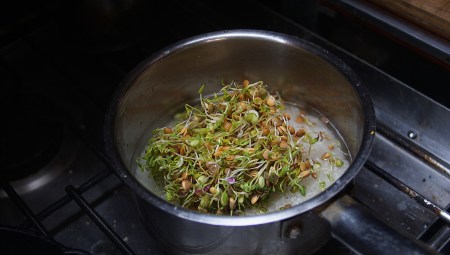

In our experience, the most dependable sprouters are brown lentils, radish, fenugreek and mung beans. They germinate in 2-3 days.
Sprouting reduces anti-nutritional compounds in raw legumes making more of their nutrients available. Microgreens are germinated legumes grown up to 10cm, microgreens contain considerably higher levels of vitamins and carotenoids, about five times greater than their mature plant counterparts. Dry seeds last a long time, and take up little space on a boat.
Jar Method: Use wide-mouth, glass canning jars, available at many hardware stores. Make a screen using a fine mesh that will permit water to pass. Put seeds in a jar, add water, and soak overnight. When the soaking is over, invert the jar and drain water through the mesh, then rinse again. Prop the jar at an angle so water can drain. Keep out of direct sunlight. Rinse seeds 2-3 times each day until ready.
The soaking liquid for the sprouts is rich in soluble vitamins and minerals, and can be used to water plants onboard. We also like to sprout wheat berries to make bread. The sprouted berries soften, and are easy to grind with a simple meat grinder. These types of grinders are inexpensive, and easy to find in thrift stores.
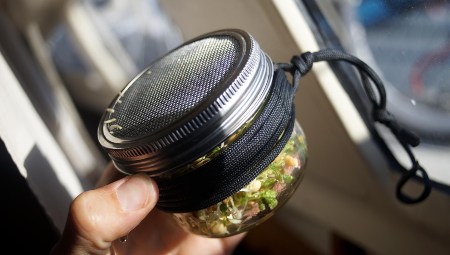

We hang our sprouting glass jars over the galley sink. In the beginning we used mesh tied with elastic bands over the mouth of each jar, but have recently replaced them with stainless steel screened lids, which are easier to clean than mesh.
See this guide for information on how to sprout all legumes, seeds or beans.
PRESSURE COOKER:
Foods that require 60 minutes on the stovetop will take 10-15 minutes in a pressure cooker. Pressure cookers are airtight containers, designed to allow pressure to build-up beyond atmospheric pressure.
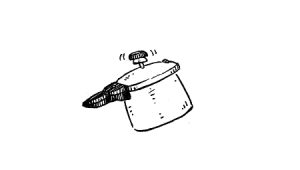

We cook entire meals at once, for example we’ll place ingredients for chili in the bottom of the pot, with a trivet overtop with a covered bowl of rice and water. The whole meal is ready in 10 minutes.
Pressure cookers are generally quite big, and double as a big pot(we use ours to boil corn).
INSULATION COOKING:
Insulation cooking involves bringing a dish to boil, turning the heat off, covering the dish with a lid, and placing it in an insulated container. Over a period of time, the dish cooks by the heat captured in the insulated container. Cooking food this way brings energy consumption down threefold. The only requirement is that the food must be prepared ahead of time, since the cooking time is longer. It is useful on a boat, when a meal is cooked once in the morning with it ready to eat later in the day, still hot.


There are insulation cookers on the market, but it is possible to make one for cheap by using thick blankets or a sleeping bag. To make a quick insulated space, use a plastic bin, or wooden crate, and fill it with thick blankets or a sleeping bag, leaving a deep well in the center. Insert the pot in the well and cover with more blankets. The pot will stay warm for hours.
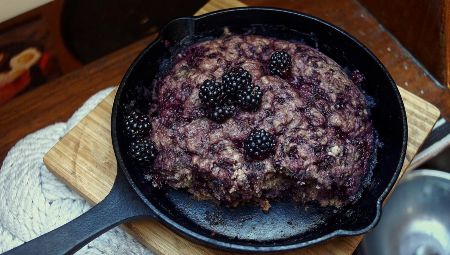
We have cooked stovetop cakes using this method (our stovetop blackberry cake below).

It’s also possible to cook rice in a thermos, by simply pouring hot water over it and leaving it to slow cook.
INDUCTION COOKING
Induction cooktops are becoming more common on boats. It creates heat rapidly by magnetically accelerating metal molecules in steel, cast-iron and some stainless steel pots. It transfers 90 percent of its heat to a pot. They use heat efficiently (90% compared to other electric cookers) and because they heat the pot material there is less heat loss. Nearly all of the energy is converted into cooking the food. A downside of IH is the high-power draw, which ranges between 1200-1800W for a single plate.
We used a single IH cooktop while in Japan, since it was difficult to refill an LPG tank. We enjoyed the experience, but we were connected to shore power at the time and would never think to use it while at anchor. Using an IH cooker off the grid is possible, but requires a large battery bank, a larger inverter, and more solar and/or a generator. Smaller boats like ours do not have a large battery bank, or infinite surface for solar. In any case, IH cookers are more energy efficient than conventional electric cookers.
SUN DRIERS
Dehydrating fresh foods when they are in season is another way to save energy, it also reduces the volume of food, saving precious space and weight on board. Drying food with the sun on a boat is more efficient in warm places.
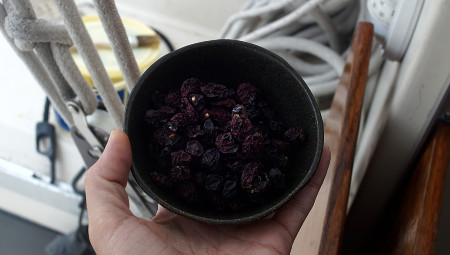

When drying food, pick quality produce, and wash items well. This website has good information. Pre-treating certain fruits(apples, apricots, peaches, and pears) with ascorbic acid(2 ½ tbsp:1 quart water), citric acid(1 tsp:1 quart cold water) or lemon juice(1:1 cold water) will help preserve their nutrients and color. Soak for 10 minutes, then remove with a slotted spoon, drain and proceed to dehydrate.
There are solar driers on the market, but building one is inexpensive, and easy. It consists of layering shelves made with screens (to allow air to pass all around), and covering it with a net to protect from insects. When insects aren’t an issue, another solution is to string the pieces of food with a strong thread and to hang them in the sun (may not work well on windy days). In Japan, this is the technique used to dry entire hachiya persimmons, but the process for an entire fruit is longer, and can take eight weeks of drying and massaging, maybe not a good idea for a cruising yacht. Cutting fruit into small pieces will hasten drying. The higher the water content, the larger the slice size should be.
We experimented with drying bananas and vegetables on deck while in Fiji, using a wide metal bowl we had onboard. It worked well enough, but we had to flip the pieces often to dry them well on both sides. This technique is not as efficient as a suspended drier, but it works well for small quantities. We would take the bowl in at night if the drying process wasn’t complete, and put it back on deck come morning.
Check that each piece is dried uniformly, and pack them in airtight containers. For long-term, it is a good idea to vacuum seal them, or to add packets of food-safe dessicants. Properly stored, dried fruits keep well for six to 12 months. The reconstituted food retains most nutrients. We like to add them to pasta or rice water while cooking.
CONCLUSION
Using less energy by cooking efficiently allows for more time spent at sea, which is critical on long ocean passages, or in the event of an emergency. Adopting energy-saving cooking habits allows the cook to spend less time in the galley, while providing high-nutrient, and flavorful foods to all onboard.
………………………………………………………………………………………………………………………………………
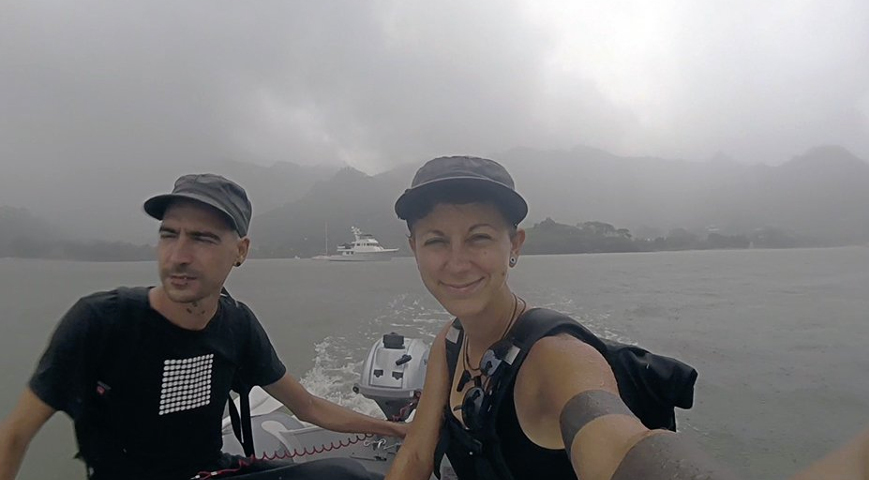

Rekka is a cartoonist and writer and her partner Devine is a programmer and musician. Together they create interactive design software while living on board their 10m sailboat “Pino” – a Yamaha 33.
Since 2016, they have sailed Pino from Canada, down the US West Coast to Mexico, over to French Polynesia, Cook Islands, Niue, Tonga, NZ, Fiji, the Marshall Islands and then on to Japan. Finally they looped back to British Columbia where the are currently.
They operate a small research studio called Hundred Rabbits, where they do experiments in resilience and self-reliance using low-tech solutions.
The ways in which they spend their time vary wildly from day to day, but they focus on alternative ways to store power and minimum viable solutions for technological tooling.
Read Rekka’s other articles for INSIGHTS:
…………………………………………………………………………………………………………………………………..
Other INSIGHTS can be found here.
- SV Totem: Coooking with a Solar Oven
- Ya: The Yacht that Sailed the World Fossil Fuel Free
- Practical Sailor: Thermal Cooking articles
- Boat Galley: Thermal Cooking articles
…………………………………………………………………………………………………………………………………..
The opinions expressed in this article are the author’s own and do not reflect the view of Noonsite.com or World Cruising Club.
…………………………………………………………………………………………………………………………………..
Related to the following Cruising Resources: Cruising Information, Insights, Liveaboard Tips

I use the same s/s stove top espresso pot as the authors show. My contribution to saving energy is in my first morning routine: I heat the espresso pot, meanwhile I put my one egg (I sail solo) in a small pan of raw water, when the coffee has brewed I put the hot coffee pot in the raw water to transfer the heat to it, when the water boils I turn it off and let the egg sit for another 2 to 3 minutes and the hot raw water is then used to wash last night’s dinner utensils.
We used a “Thermal Magic Cooker” when cruising through Indonesia and it was one of the best pieces of equipment we had on the boat. I would cook our evening meal in the cool of the morning and leave it in the thermal cooker all day. It was great for overnight or extended passages as there was always a good meal ready before going on watch. Great article Rekka – lots of excellent tips. Happy sailing.
Thank you so much Rekka for this a great overview with useful links for anyone who wants to use less energy and yet lead a good life! Inge (www.fossilfreearoundtheworld.org)
Glad you enjoyed it. Devine & I are familiar with your boat. We’ve stumbled often on your website often while doing research on power generation at sea. Hope your voyage is going well.